Objectives / Rules
- Join the dots, and create a single continuous loop.
- The clues tell you how many of the four surrounding sections contain a line.
- The loop never crosses itself, and each dot can only have zero or two lines passing through it.
See Getting Started and the Walkthrough below for extra tips and tricks.
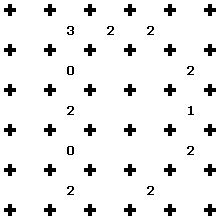
What are the numbers for?
These tell you how many lines surround that square.
Click or move your mouse over the puzzle to see the answer.
These tell you how many lines surround that square.
Click or move your mouse over the puzzle to see the answer.
Getting Started

A 0 clue means that there is no loop around this square, and we can mark all of the edges with crosses.
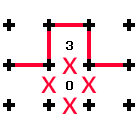
A 3 and a 0 together. As we have a zero, this cannot be a line, and the other three must be, and the loop carries on both sides.

Two 3's together. No matter where loop goes, these will always be lines.

Two 3's diagonally. No matter where loop goes, these will always be lines.

A 3 and a 0 diagonally. No matter where loop goes, these will always be lines.
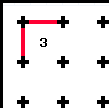
3 in a corner. No matter where loop goes, these two will always be lines.
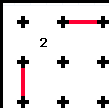
2 in a corner. No matter where loop goes, these two will always be lines.
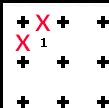
1 in a corner. No matter where loop goes, these cannot be lines.
Walkthrough

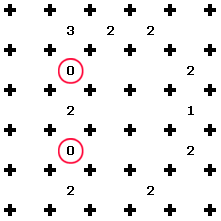
Step 2
These 0 clues mean that there are no lines surrounding these squares, so we can mark them with crosses.
These 0 clues mean that there are no lines surrounding these squares, so we can mark them with crosses.
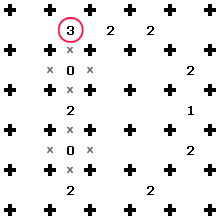
Step 3
There is only one way of having 3 lines around this square, as we already have a cross along the bottom.
There is only one way of having 3 lines around this square, as we already have a cross along the bottom.
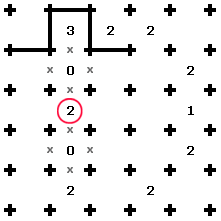
Step 4
There are now only remaining 2 places for the loop to go for this 2 clue.
There are now only remaining 2 places for the loop to go for this 2 clue.
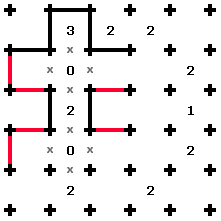
Step 5
This is the only route allowed for the loop, to avoid the crosses we have.
This is the only route allowed for the loop, to avoid the crosses we have.
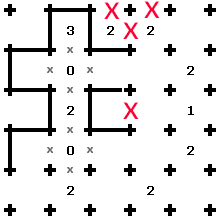
Step 6
There are now some crosses we can add, either because we've satisfied a clue, or a line would create a loop that's not allowed.
There are now some crosses we can add, either because we've satisfied a clue, or a line would create a loop that's not allowed.
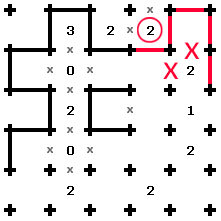
Step 7
We have to satisfy the 2 clue, and this creates some crosses and the loop must go this way.
We have to satisfy the 2 clue, and this creates some crosses and the loop must go this way.
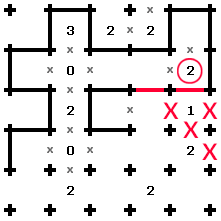
Step 8
The loop must go this way to satisfy the 2 clue, which completes the 1 clue as it passes.
The loop must go this way to satisfy the 2 clue, which completes the 1 clue as it passes.
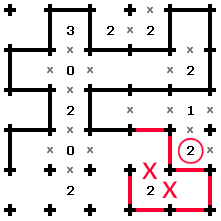
Step 9
The loop must go this way to satisfy the 2 clue, which adds crosses and the loop continues around the bottom.
The loop must go this way to satisfy the 2 clue, which adds crosses and the loop continues around the bottom.
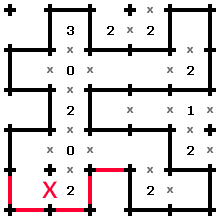
Step 10
This is the only route for the loop, remembering to add crosses as we go, and the puzzle completes.
This is the only route for the loop, remembering to add crosses as we go, and the puzzle completes.
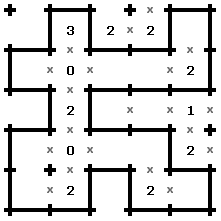
Step 11
The completed puzzle.
The completed puzzle.